



Integrated Full Body Harness D-Rings, Fit and Connections
The right D-ring matters as much as the harness itself. For fall arrest, connect the lanyard to the dorsal D-ring between the shoulder blades. Shock-absorbing lanyards are intended for a dorsal or sternal D-ring. An integrated full-body harness with attachment points supports the wearer while assigning each connection a specific purpose.
It’s easy to focus on straps and buckles, but attachment-point location helps determine how a harness works for fall arrest, positioning, climbing, or restraint. Using the wrong connection can put the equipment to work in a way it wasn’t designed for.
This guide explains how a full-body harness supports the wearer, what different D-rings are used for, and how selection, sizing, and fit affect the setup. You’ll also learn why connection type matters, so you can match the attachment point to the task and understand the role of full-body harnesses and related gear in aerial and climbing applications.
Key Takeaways
- Learn how a full-body harness supports the wearer and why its connection point affects how it works.
- Match the lanyard to the task by understanding the different roles of dorsal, sternal, and positioning D-rings.
- See how harness size, adjustment, and fit contribute to a secure setup without restricting necessary movement.
- Identify how attachment-point configurations differ for fall arrest, restraint, climbing, work positioning, and rescue.
What is a Full-Body Harness and How Does It Work?
A full-body harness supports the upper legs, hips, chest, and shoulders during fall arrest. Its straps distribute force across the body, while the selected D-ring connects the wearer to the fall-arrest system.
Fall-Arrest Strength and Force Requirements
A fall-arrest harness restrains a worker after a fall and distributes the arrest force through its structure. The harness and connected system must work together to limit the force on the wearer.
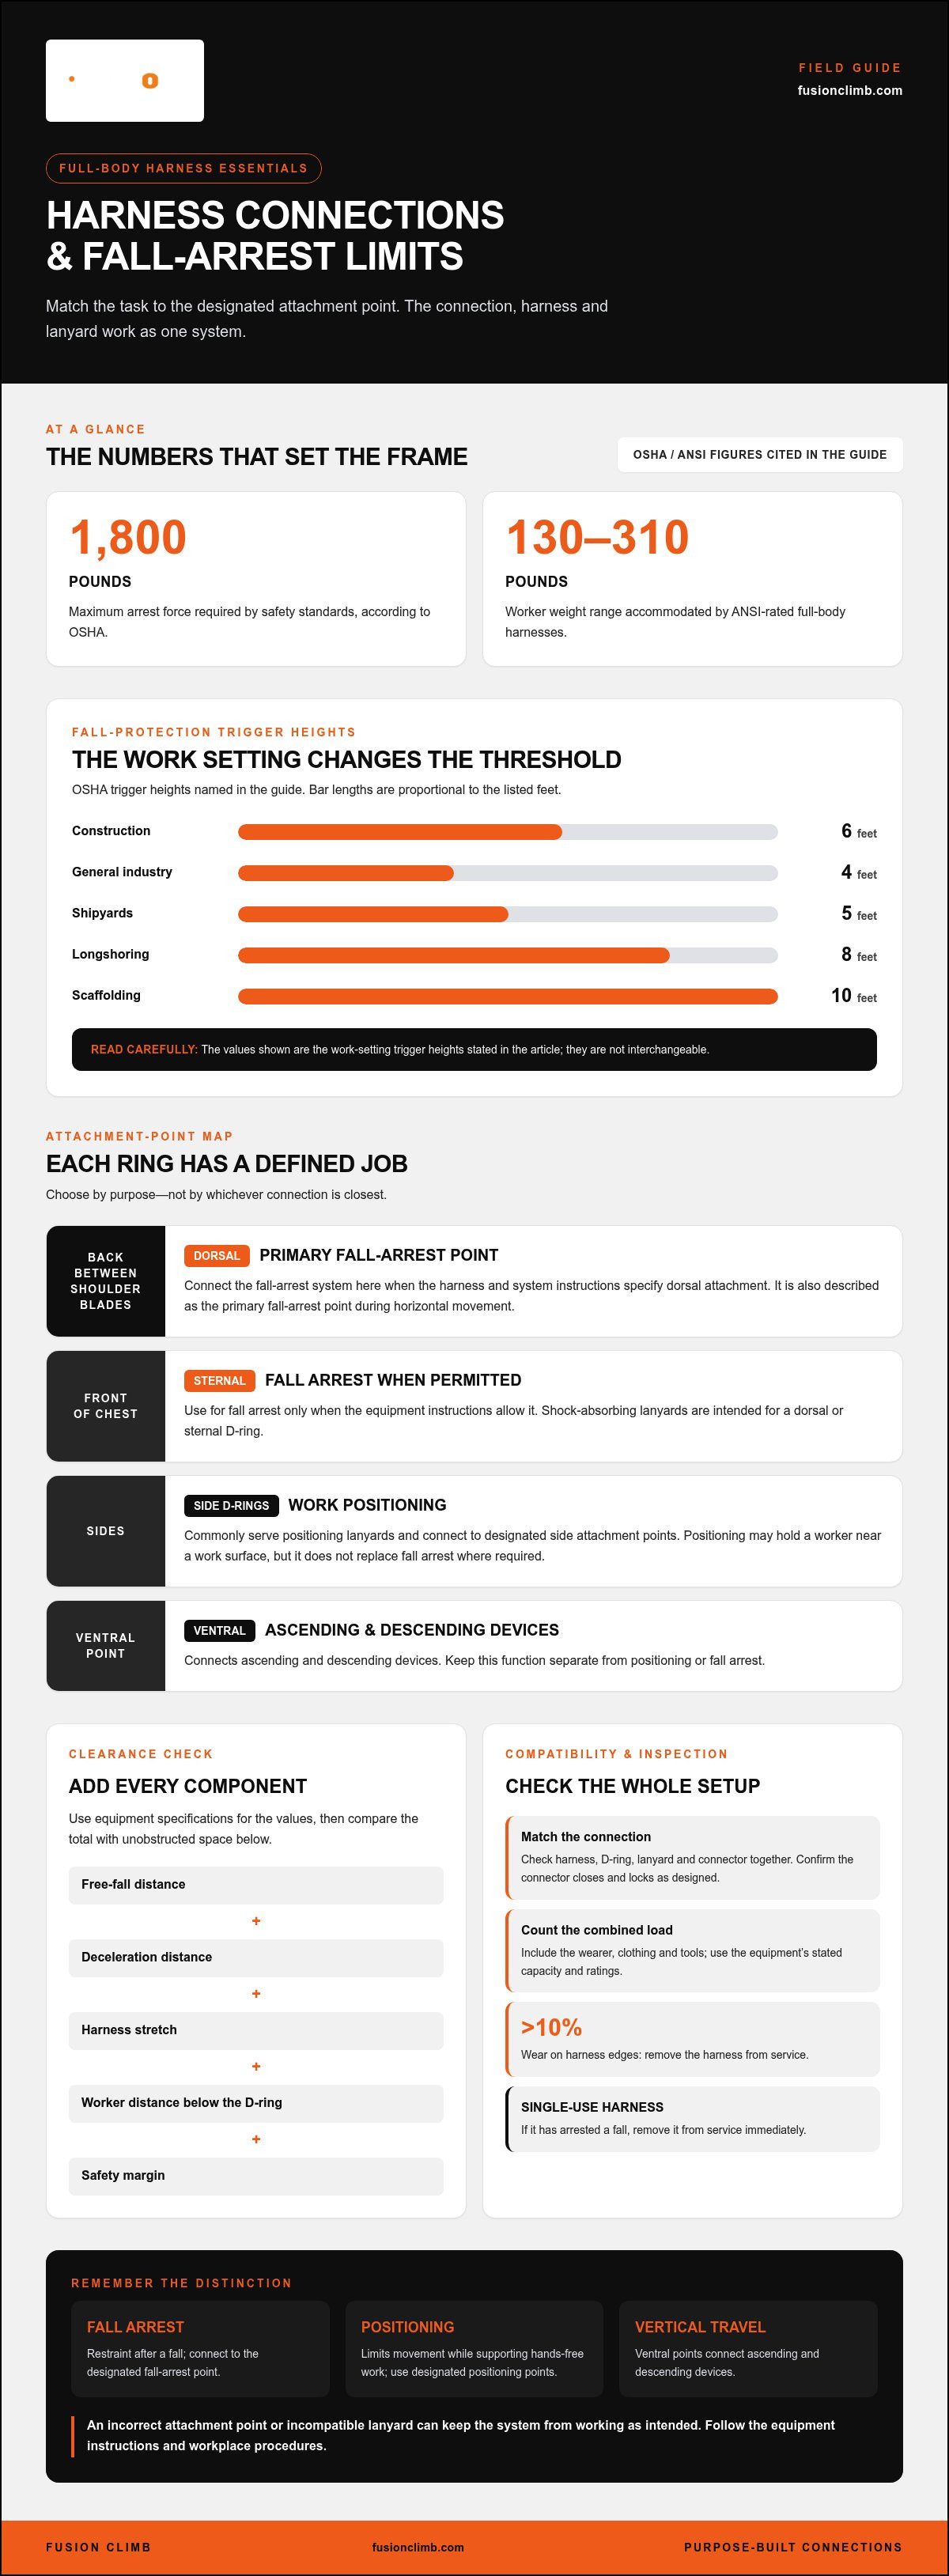
According to the Occupational Safety and Health Administration, the maximum arrest force required by safety standards is 1,800 pounds. OSHA’s fall-protection trigger heights vary by work setting: 6 feet for construction, 4 feet for general industry, 5 feet for shipyards, 8 feet for longshoring, and 10 feet for scaffolding. ANSI-rated full-body harnesses accommodate workers weighing between 130 and 310 pounds.
Dorsal and Sternal D-Rings
The dorsal D-ring sits on the back between the shoulder blades and serves as the primary fall-arrest attachment point. Connect the fall-arrest system here when the harness and system instructions specify dorsal attachment.
A sternal D-ring sits at the front of the chest and can be used for fall arrest when the equipment instructions allow it. Match the lanyard to the harness’s designated use, not simply the nearest ring, because the connection point affects how the system holds the wearer.
To assess fall clearance, add the system’s free-fall distance, deceleration distance, harness stretch, the worker’s distance below the D-ring, and a safety margin. Use the equipment specifications for those values, then compare the total with the unobstructed space below.
Fall-Arrest Force Distribution
Force distribution describes how a harness transfers arrest forces from its attachment point through the straps and across the wearer’s body. A correctly fitted harness spreads the load across the upper legs, hips, chest, and shoulders instead of concentrating it at one point.
Inspect the harness at the interval specified by its manufacturer and workplace procedures. Remove it from service if its edges show more than 10% wear; a single-use fall-arrest harness that has arrested a fall must be removed immediately.
Connecting a lanyard to the appropriate D-ring
Choose the D-ring for the connection’s purpose, then match the lanyard and connectors to the harness. The right setup depends on whether the task requires fall arrest, positioning, or movement along a route.
Work-Positioning Connection Points
A work-positioning connection limits how far a worker can move while supporting hands-free work. Side D-rings commonly serve positioning lanyards, while the dorsal D-ring is the primary fall-arrest point during horizontal movement.
Before connecting, identify the task and the harness point designated for it. A positioning lanyard connects to the designated side attachment points, not automatically to the back ring. This distinction matters at height because positioning and fall arrest serve different functions. A positioning setup may hold a worker near a work surface, but it doesn’t replace a fall-arrest system where one is required.
Ventral attachment points connect ascending and descending devices. Keep their function separate from positioning or fall arrest. The connection should allow the intended movement without changing the system’s purpose.
Risks of Incompatible Connections
An incorrect attachment point or incompatible lanyard can keep a fall-arrest or positioning system from working as intended. The wearer may not remain in the expected orientation, and a connector may not engage properly with the harness point.
What are the risks of using the wrong harness attachment point or an incompatible lanyard? The connection may not perform its intended role, increasing the risk of injury during a fall or movement. Match the lanyard to a designated harness point, and use shock-absorbing lanyards only with a sternal or dorsal D-ring.
Check compatibility across the entire connection: harness, D-ring, lanyard, and connector. Confirm that the connector closes and locks as designed and attaches only to the intended point. Capacity also applies to the combined load, including the wearer, clothing, and tools. Use the equipment’s stated capacity and ratings rather than judging compatibility by appearance.
For a task requiring a dedicated tether, lanyard and tether options can help frame the connection choice around the intended movement and attachment point.
Harness selection, sizing, and fit
Choose a harness for the task, attachment method, and wearer’s combined load. A suitable fit holds the harness securely while allowing the movement required at work.
Selecting a Harness for the Task
Task selection means matching the harness design and attachment points to the work. This matters because fall arrest, positioning, and vertical movement use different connections.
Start by identifying the required system: fall arrest needs a compatible fall-arrest connection, while positioning requires points designed for that purpose. Consider the work area, expected movement, and whether tools or clothing add to the wearer’s load. For example, a worker moving along a structure needs a setup that supports the intended movement without treating a positioning connection as fall arrest.
Harness Selection Factors
Harness selection brings together the task, attachment configuration, wearer fit, and total load. The harness and connected equipment must suit the work as a system.
ANSI-rated full-body harnesses accommodate workers weighing between 130 and 310 pounds. Count the person, clothing, and tools when comparing the combined load with the harness capacity. Also consider D-ring location, work posture, and the movement needed to complete the task. A shoulder-level connection may suit a different activity than a dorsal or side attachment.
Sizing and Fit
Harness fit means adjusting the straps so the equipment stays correctly positioned on the wearer. Proper adjustment matters because loose or twisted webbing can shift during movement and interfere with the fit.
Use each adjustment point to position the leg, torso, and chest straps, then check that the webbing lies flat. The Contractor Series Harness has five adjustment points: two leg, two torso, and one chest adjustment. Confirm that the shoulder straps sit securely and the harness allows necessary movement without hanging loose. Recheck the fit over the clothing worn at work, since layers can change how the straps sit.
Full-body harness components and attachment-point configurations
Harness components work together, but each attachment point has a distinct purpose. Identify its intended function before connecting equipment or planning movement.
Harness Components
A full-body harness combines webbing straps, adjustment points, and designated attachment points to support the wearer. Understanding how these parts relate helps you identify which connection is suited to each task.
Straps cross the shoulders, torso, and legs, while adjustment points position the harness on the body. D-rings provide connection locations, but their placement indicates their intended use. A dorsal ring at the back, for example, serves fall arrest, while lateral rings can support work positioning. Lanyards and connectors complete the system, so each component must suit the activity.
Harnesses are used across industries for fall arrest, climbing, restraint, or access. A harness may have several attachment points, but they aren’t interchangeable. Read the labels and instructions to identify each point’s purpose before work begins.
Attachment-Point Configurations
An attachment-point configuration is the arrangement of D-rings designed for specific movements or tasks. Recognizing the layout helps prevent using a connection for a function it wasn’t designed to perform.
The dorsal D-ring sits at the back for fall arrest, while a sternal D-ring supports vertical movement, such as climbing a ladder, when the harness instructions allow it. Lateral D-rings sit at the sides for positioning, helping workers use both hands. A travel-restraint ring sits at the center back, at belt or waist level, to restrict access to an area.
Harnesses for ascending or descending may have one or two D-rings at waist or chest level. Evacuation connections use a pair of shoulder- or chest-level D-rings, which may attach to a spreader bar. Class E harness shoulder points serve rescue or confined-space work. These configurations serve different purposes, so choose by task rather than convenience.
Review full-body harness options as you compare attachment layouts with the movement and connection needs of your work.
Fusion Climb: Full Body Harnesses
Fusion Climb offers full-body harnesses for choosing equipment around a specific activity and attachment-point configuration. Compare the task, movement needs, and connection type before selecting a harness. For aerial adventure applications, Superman Style Harnesses and zipline pulleys are related equipment options, while lanyards and tethers connect compatible gear.
Use these distinctions to narrow your choice: identify each attachment point’s intended function, then consider which equipment suits that setup. A harness for one activity isn’t automatically suitable for another, so match the configuration to the planned work or recreation.
Explore Fusion Climb harness and connection equipment, or contact Fusion Climb to discuss the available offerings.
Make Your Next Connection Count
Before your next task, turn the work plan into an equipment decision. Consider where movement is required, how the system connects, and whether the harness configuration suits that use. An integrated full-body harness with attachment points is most useful when its connections align with the activity, rather than being treated as a one-size-fits-all setup.
Base the decision on the complete system and the person wearing it. Keep the intended task clear, choose compatible components, and follow the equipment instructions when preparing to work or take part in aerial recreation. A deliberate selection process helps you choose a setup for its intended purpose.
For equipment options suited to harness and aerial applications, contact Fusion Climb. Take the next step with a clear plan and keep your focus on the work ahead.
Frequently Asked Questions
What is an integrated full body harness with attachment points?
An integrated full-body harness with attachment points combines body-supporting straps with designated locations for connecting compatible equipment. Its layout brings the harness and connection points together in one wearable system, rather than treating attachment hardware as a separate belt. For example, a worker can identify the ring intended for the planned system by checking its placement and the harness instructions.
What attachment points are common on full body harnesses and what is each used for?
Common points include dorsal, sternal, lateral, ventral, shoulder, and travel-restraint D-rings, each with a different use. A worker who needs to climb vertically, for example, may use the sternal point if the harness permits it. Lateral rings support work positioning, while ventral points connect ascending or descending devices. Shoulder points on Class E harnesses serve rescue or confined-space work.
How to choose a full body harness for fall protection and work positioning?
Choose according to the task’s required system, the wearer’s fit, and the equipment connecting to the harness. A worker who needs to stay near a work surface, for example, needs a positioning setup, while fall protection calls for a compatible fall-arrest system. Include clothing and tools when assessing total load, and match every connector to its intended harness attachment point.
How to inspect, fit, and adjust a full body harness correctly?
Follow the manufacturer’s instructions, examine the harness before use, and adjust it while wearing the clothing required for the task. Inspect the webbing, stitching, buckles, labels, and D-rings for damage or changes that could affect use. Check that straps lie flat, hardware closes as designed, and movement doesn’t shift the harness out of position. Remove questionable equipment from use for evaluation.