



Full body prone harness fit and support for zipline flights
A full-body design is a practical starting point for zipline flights when the setup allows it. It secures the legs, chest, arms, and waist, while a half-body harness provides less coverage. A Full body prone harness for zipline flights should fit securely and be adjusted to the wearer before launch.
Choosing a harness involves more than comparing full-body and half-body coverage. Padding affects comfort and heat, while the materials, adjustment points, and donning sequence influence how the harness sits and supports the body in a prone position. Fit matters: loose or poorly positioned straps can reduce support, while excessive tightness can restrict movement.
This guide explains what to assess in harness construction, padding, leg and torso support, adjustment, and donning. It compares full-body and half-body designs to help you understand why greater coverage may suit prone flight, and how comfort and fit affect the choice. Use these practical points to evaluate equipment before the ride.
Key Takeaways
- Assess harness construction and materials alongside fit; comfort alone doesn’t indicate whether a design provides suitable support.
- Balance padding against heat and movement, especially when considering leg and torso support for a prone flight.
- Use a consistent donning and adjustment sequence to help identify loose, twisted, or poorly positioned straps before launch.
- Compare how full-body and half-body designs support the wearer, then match the coverage to the flight setup and intended position.
Harness construction and materials
A prone harness must support the rider in a stable position and connect to the zipline system. Its webbing, load-bearing seams, adjustment points, and attachment hardware work together, so assess them as one assembly. Metal buckles, such as steel or aluminum, are preferable to plastic buckles in harness construction. Buckle material alone, however, does not establish whether a complete harness fits or suits a particular flight.
Look for a design that lets the straps lie flat and stay correctly routed after adjustment. Twisted webbing can create pressure points, while loose or misplaced straps may compromise support. Follow the manufacturer’s instructions for inspection and fitting, and remove damaged or altered equipment from service. OSHA and ANSI standards can help assess harness testing and construction. A rating or standard applies to specific equipment and conditions, not every combination of harness, pulley, tether, and zipline.
There is no single nationwide fare for a prone zipline flight. The price depends on the operator’s course, ride format, and included equipment. In the United States, prone or Superman-style flights are offered at courses designed for that riding position. Course configuration matters because a harness alone does not provide the complete connection to a zipline.
Prone setups generally pair a full-body or Superman-style harness with a zipline pulley and connecting hardware, such as a lanyard, tether, or carabiner. The harness must match the intended body position and attachment arrangement. Each ride sets its own weight, height, age, and health restrictions based on its equipment, fit requirements, and operating conditions. The rider must fit the harness as designed, and the complete system must remain within its applicable limits. Suitability depends on these factors, not the harness style’s name alone.
Leg and torso support and padding
In prone flight, leg and torso support help maintain the rider’s intended position. Fit and padding affect how that support feels throughout the flight.
Leg and Torso Support
Leg straps support the thighs, while torso straps help keep the upper body aligned with the harness. Assess both areas in the intended prone position, not only while standing. Straps should lie flat and follow the harness’s routing. For example, a twisted thigh strap can press unevenly when the rider extends their legs forward. Check that the leg and torso sections work together without restricting the required position.
Padding and Comfort
Padding cushions contact areas such as the thighs and torso, where the harness webbing rests against the body. More padding can increase heat, particularly in hot conditions. Balance cushioning with ventilation and the expected environment. For example, a heavily padded design may feel warmer during a long wait in direct sun. Comfort also depends on placement: padding should sit beneath contact points without bunching or shifting during adjustment.
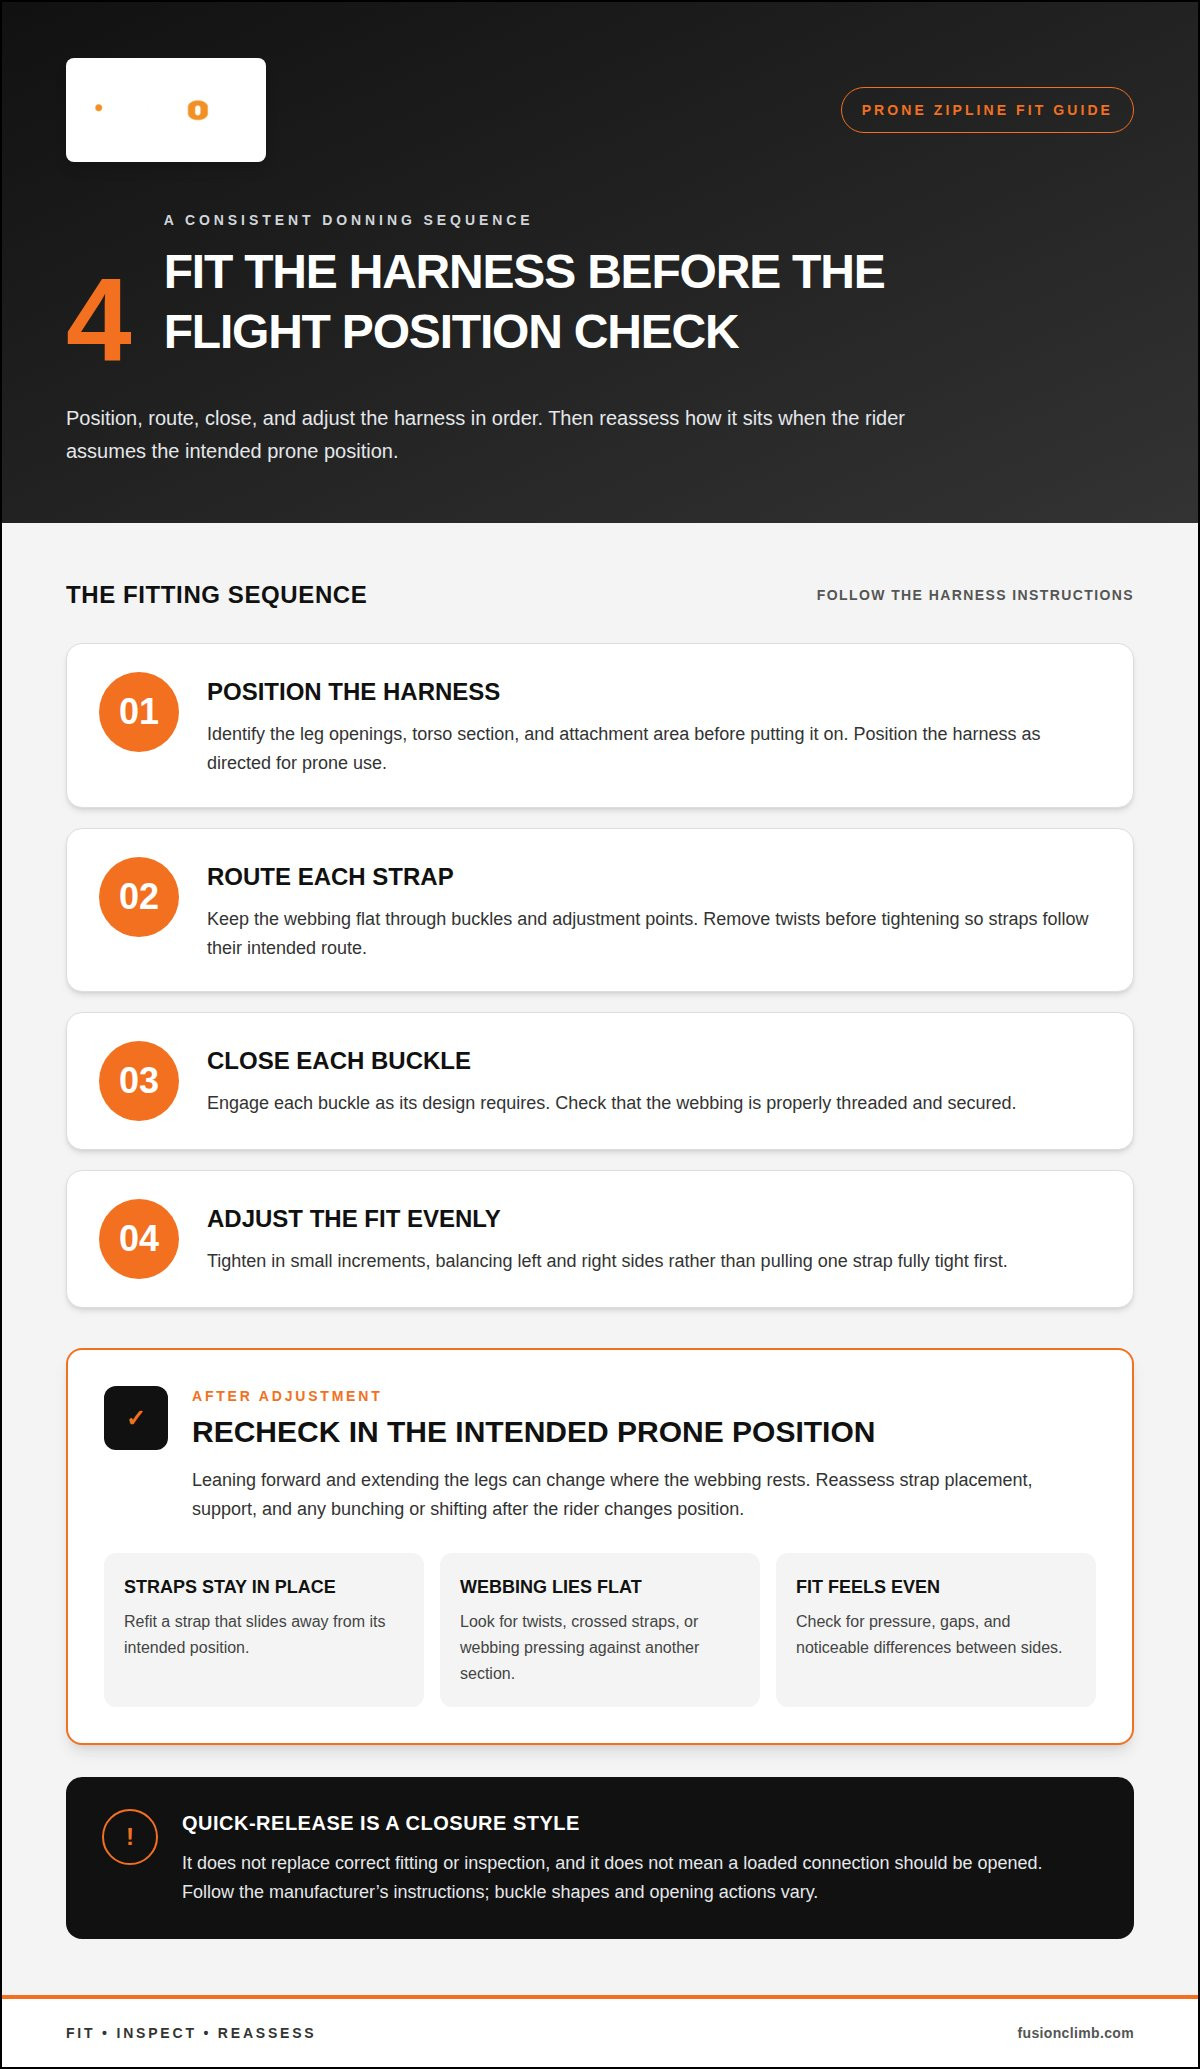
Use a deliberate fitting sequence. First, position the harness as directed for prone use. Settle the leg straps against the thighs and the torso section against the body. Then adjust each strap evenly so one side does not fit noticeably differently from the other. Reassess after the rider assumes the flight position, since the body angle can change where the webbing rests.
Check for pressure, gaps, and movement. A strap that slides away from its intended position may need adjustment; one that presses sharply into a single area may indicate poor placement or fit. Check both thighs and the torso, then reassess after repositioning. Clothing matters too: bulky seams or a packed pocket beneath a strap can create a pressure point.
Padding does not replace correct sizing or adjustment. A soft contact surface can still fit poorly if the leg openings, torso support, or strap positions do not suit the rider. Compare the fit while upright and prone, and note whether the rider can maintain the required position without shifting to relieve pressure. Recheck after each adjustment.
Quick-release adjustment and donning
Correct donning starts with positioning the harness according to its instructions. For prone flight, each strap must follow its intended route before adjustment begins. A quick-release buckle can make opening and closing easier, but it does not replace correct fitting or inspection.
Use a consistent sequence so no strap is skipped:
- Position the harness. Identify the leg openings, torso section, and attachment area before putting it on.
- Route each strap. Keep webbing flat through buckles and adjustment points; remove twists before tightening.
- Close each buckle. Engage it as its design requires, then check that webbing is properly threaded and secured.
- Adjust the fit. Tighten in small increments, balancing the left and right sides rather than pulling one strap fully tight first.
After adjustment, assess the fit in the intended prone position. A harness can sit differently once the rider leans forward and extends their legs. Check that the straps stay in place, the body is supported as designed, and no section bunches or shifts. For example, if a thigh strap slides as the rider repositions, refit it before connecting the rider.
“Quick-release” describes a closure style, not permission to open a loaded connection. Follow the manufacturer’s instructions for operating each buckle and connecting the harness to its system. Do not assume a release tab is an emergency-release feature. Buckle shapes and opening actions vary, so identify the intended release mechanism before fitting the harness.
Finish with a second visual and tactile inspection. Confirm that each buckle is closed, adjustment tails are controlled as directed, and no strap crosses or presses against another. Have the rider change position once, then reassess the fit. If an adjustment loosens or a buckle behaves differently from the way its instructions describe, stop and resolve the issue before flight. A repeatable donning routine makes omissions easier to spot.
Full-body versus half-body harnesses
A prone zipline harness supports a forward-facing position, while seated or upright setups hold the rider differently. The harness must match both the flight position and the zipline system.
A full-body design can provide support across multiple areas of the wearer’s body. This coverage can help distribute impact forces around the body during a sudden fall. It can also make rescue and retrieval easier than a half-body harness. These advantages depend on the complete setup and correct fit, not coverage alone.
A half-body harness generally supports the waist and legs without the same upper-body coverage. That difference matters when a rider is suspended prone, because the torso and limbs need support suited to that posture. Operators should match the harness to the course, connection system, and riding position. A harness designed for seated travel is not automatically suitable for a Superman-style flight.
Prone, seated, and upright positions change how the rider’s body meets the harness. A seated rider bends at the hips, while a prone rider extends forward, placing straps and attachment points differently. Compare the harness’s intended orientation with the pulley connection and the rider’s posture. For example, a setup intended to keep the rider horizontal requires compatible support around the torso and legs.
Use these decision points to compare designs:
- Coverage: Full-body designs secure more areas, including the chest and arms; half-body designs offer less coverage.
- Position: Match the harness to prone, seated, or upright travel and its intended attachment arrangement.
- Response: Consider how full-body coverage may support impact-force distribution and rescue retrieval.
When the course and system allow it, a full-body harness is a practical starting point for zipline use because it secures more of the rider’s body. The final choice still depends on the course design, connection hardware, and required flight posture. Compare these elements as one system. Do not choose by harness category alone: the design must fit the rider and work with the actual zipline configuration.
Fusion Climb: Full Body Harnesses
Fusion Climb offers Full Body Harnesses and Superman Style Harnesses for zipline applications. These options provide a starting point when choosing equipment for prone positioning or broader body support. Pairing a harness with compatible Zipline Pulleys and a lanyard or tether addresses other components of the setup. Base selection on the intended riding position, fit, and system configuration.
Use this guide to identify the coverage and support features your application requires, then consider the harness and connection hardware together. Contact Fusion Climb to discuss your zipline harness and equipment needs.
Plan the Next Step With Confidence
Before choosing a setup, define the flight position and how the harness will connect to the zipline system. A clear equipment brief keeps the decision focused: note whether the rider will travel prone, identify the required support, and consider how the harness and pulley work together. This gives you a practical basis for comparing options instead of choosing by appearance alone.
A full-body prone harness for zipline flights should suit the rider’s position and the complete equipment arrangement. Fusion Climb offers Full Body Harnesses, Superman Style Harnesses, and Zipline Pulleys for zipline applications. Consider these components as part of one configuration, guided by fit and intended use.
Ready to discuss equipment for your zipline setup? Contact Fusion Climb about harnesses. Take the next step with a clear plan and equipment suited to the flight ahead.
Frequently Asked Questions
How Do I Choose A Safety Harness?
Choose a harness by matching its intended use, fit range, and connection system to the flight position. Start with the manufacturer’s instructions and specifications, then account for the rider’s body dimensions, clothing, and required posture. For example, a design that fits upright may shift when the rider lies prone. Treat the harness, pulley, and connecting hardware as one compatible assembly, not as separate components.
How Do I Know How Safe a Harness IS?
No harness or activity can be 100% safe. Assess equipment safety through its intended use, testing information, condition, fit, and operating procedures. An intact harness can still be unsuitable if its connections don’t match the zipline system. OSHA and ANSI standards can help inform reviews of harness testing and build quality, but they don’t replace correct use, maintenance, or a complete system assessment.
How To Judge A Harnesses Build Quality?
Assess product documentation alongside the harness’s physical condition. Review its stated materials, load-bearing components, applicable standards, and manufacturer instructions. Look for damaged webbing, pulled stitching, corroded hardware, or buckles that do not engage properly. A clean exterior alone does not establish suitability. Clear product identification and application information help distinguish equipment intended for zipline use from gear designed for another task.
What is a full-body prone harness for zipline flights?
A full-body prone harness for zipline flights supports a rider in a face-down or forward-facing position while connected to a zipline system. Its design must suit that posture and work with compatible pulleys and connectors. The phrase describes a use and orientation, not one universal model. Designs can differ in attachment points, adjustment layout, and approved applications, so match the harness to the complete setup.
How do you put on and secure a prone zipline harness?
A qualified operator should follow the harness instructions and the course’s connection procedure. Account for clothing, pockets, and other items that could sit beneath the straps or interfere with fit. After the rider assumes the intended flight position, reassess the harness and connections for movement. For example, a strap can shift as the rider leans forward. Do not alter hardware or improvise a different setup.
What safety risks and inspection standards apply to prone zipline harnesses?
Inspection concerns include webbing damage, worn seams, malfunctioning buckles, poor fit, and connectors incompatible with the system. OSHA and ANSI standards can inform evaluation of testing and construction, but they do not make every harness suitable for every zipline. There is no industry-wide mandate specifying fall-protection harness expiration dates. Operators set retirement policies based on wear and tear from their activities.